Editing a night photograph.

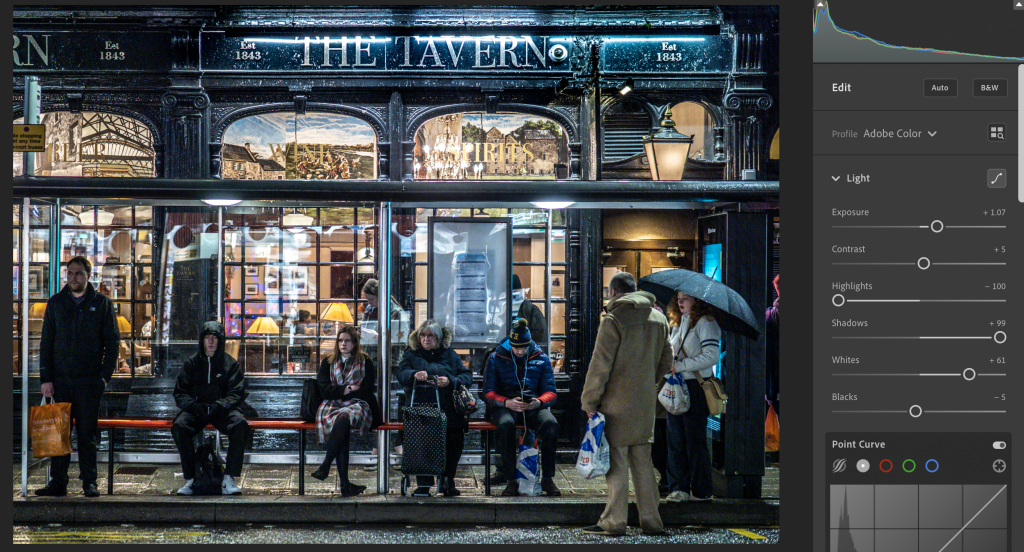
Here’s my simplified process for editing a night picture. First, when you take the picture, expose for the highlights. Adjust the exposure compensation so that the brightest lights are just clipping. If you have bright light sources in the picture you can let the centre burn out but lit objects should not be clipped. You can never recover burned out highlights. My original exposure looks like this.

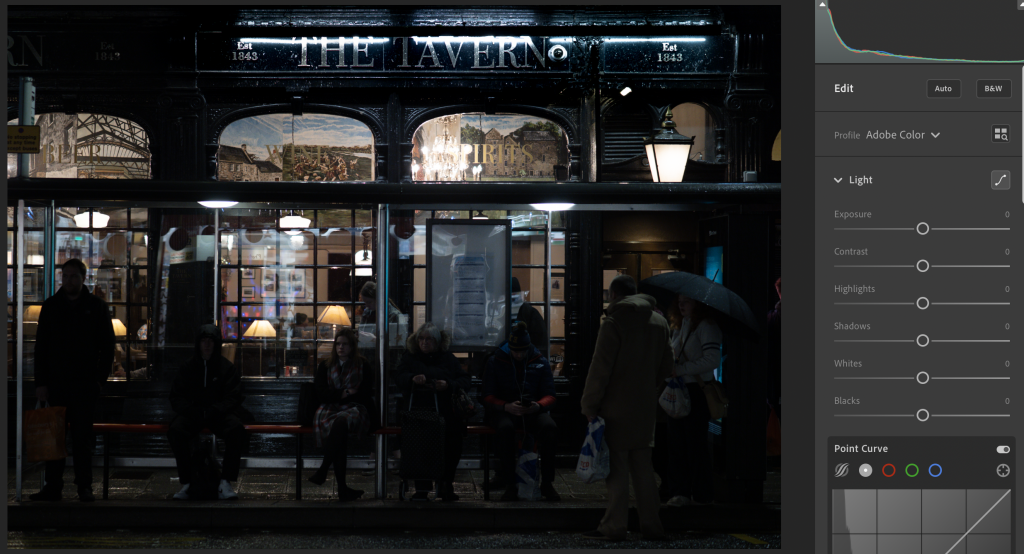
You can see that I have exposed for the lamps inside the pub. Everything else is a bit dark but that is OK. The camera settings were ISO500. F/1.2. 1/100 sec. The first thing I am going to do is reduce the highlights, increase the shadows, increase the Exposure and the Whites so my brightest areas are just clipping and I can see all the detail in the darker areas.

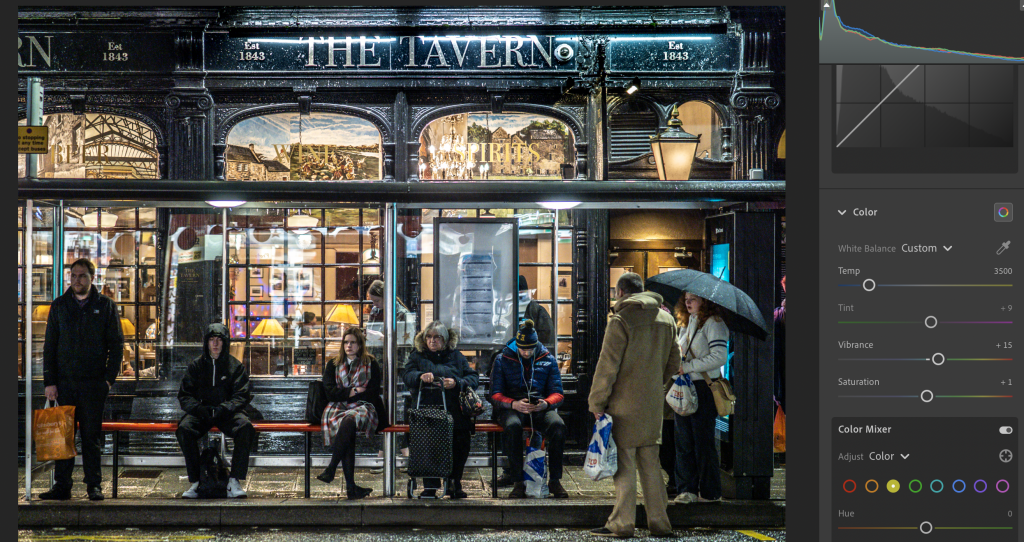
That looks better already. But I can see that the colour balance is off. It looks a bit too blue. I’m going to use the “dropper” to pick an area that I think should be neutral grey. I will use the horizontal section of the roof of the bus shelter. At this point, I see that the picture is slightly squint so I will use the Auto Level adjust feature in Lightroom to fix it.

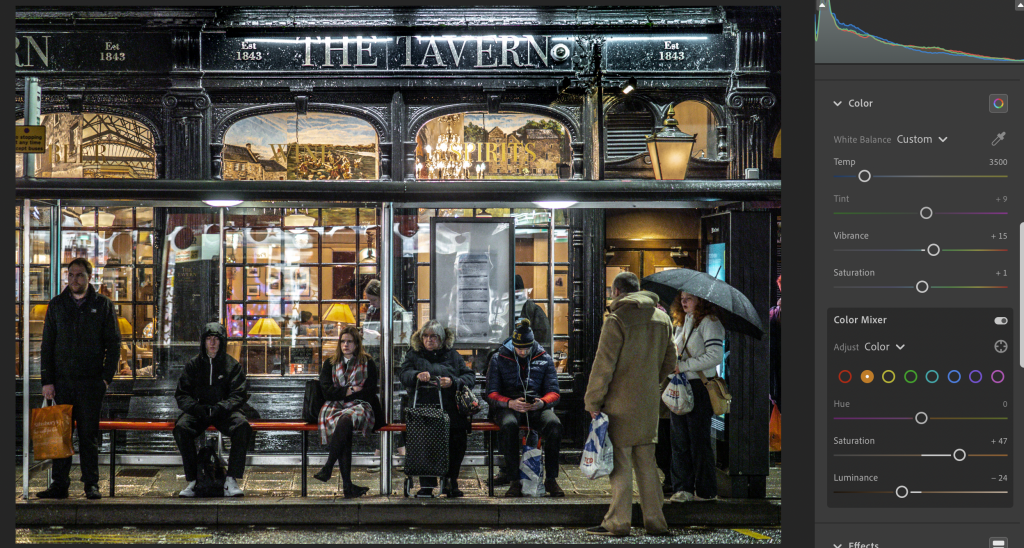
Getting better – but there is still a bit too much blue in the area around “The Tavern” and I think the interior could also be warmer. I’m going to use the Color Mixer to reduce the saturation of the blue while increasing the saturations of the Oranges and Yellows. I will also reduce the brightness of the Orange and Yellow.

To finish off, I’m going to add a gradient to the top of the picture and reduce the brightness of the area around “The Tavern”. I will also apply some noise reduction just to reduce some of the noise in the areas of the picture that we have brightened up.

Job done! That was a nice simple image where almost all the adjustments we made were global. More complicated images – with bigger variations in luminosity or colour temperature – may need local adjustments using a brush. Maybe we’ll look at an image like that in a later post.

My Cameras

For someone with an interest in low-light photography I have an unusual choice of cameras. Conventional wisdom would point you to a full-frame camera from Canon, Nikon or Sony because of their good high-ISO performance. But I use a micro four-thirds camera from Olympus, the OMD EM1 mk2. Why? Because of its smaller sensor the lenses can be a fraction of the size, weight and price of their full-frame equivalents. So I use the Olympus f/1.2 prime lenses. The big aperture lets in around 6 times as much light as an f/2.8 lens and 11 times as much as an f/4.0 lens. Combined with the amazing Olympus image stabilisation, I can work at ISO’s and hand-held shutter speeds that allow me to shoot in extremely low light and, with a small and light camera. A further advantage of the Olympus is that both the camera and the lenses are weatherproof. I can shoot all day in the pouring rain and the camera is just fine. The Ricoh is my pocket camera. With the image quality of a DSLR in a tiny package, the GR3 is much loved by Japanese Street photographers.

I also have a telephoto lens. The Olympus 40-150mm f/2.8 Pro. Great quality and super light. But maybe my favourite lens right now is the Laowa 7.5mm ultra-wide angle. This is a tiny little lens with an amazingly wide field of view. Just perfect for tight little spaces amongst buildings. It’s a Chinese lens and totally manual in operation. At first I was a little concerned that it would be a disappointment but nothing could be further from the truth.

For editing I use Lightroom CC. I’ve never learned to use Photoshop so I don’t do any fancy composite images. Just some adjustments to brightness, contrast and colour balance. But Lightroom gives you a lot of adjustment power – especially when you shoot RAW image files. I’ll give an example of “how to edit a night photograph” in another post.

Night time is the best time for Photography.

The back streets of Boston’s North End

More and more, I find my camera sits on the shelf when the sun is shining. It only comes out to play when the sun sets and the street lights come on. Night photography is challenging – but rewarding. I love the colours, the sense of drama and the thrill of discovery. I started in Perth – because it is hardly the most exciting coty ob the planet. But darkness and a good rain shower transforms the place. But my real epiphany came during my time working in Tbilisi, Georgia. Most of the photographs on this site are taken using my Olympus OMD EM1mk2 camera. Many photographers believe that small sensor camera’s like this are not good for low-light work. The prevailing wisdom is that you need to lug around an (expensive and heavy) full frame camera with an awkward and clumsy tripod. I beg to differ. The combination of Olympus wide aperture lenses and in-body-image-stabilization lets me work in almost total darkness. All of the images on this site are hand help – often with exposures of more than one second.

Welcome to my website

I always enjoyed photography. I got my first SLR camera back in 1977, and I owned a succession of digital compact cameras. But I first got serious about photography in the late 2000’s when my work took me on extended trips to the Far East: to Japan, Taiwan, Korea and China. I found myself with evenings and weekends to spare in Tokyo and Seoul and I discovered that an Asian city that is a bleak, concrete wilderness by day turns into a glorious, neon-lit fantasy land at night. In 2013 I bought myself a “real” camera, the Olympus OMD E-M1, in the Yodobashi Camera store in Akihabara, Tokyo and I treated myself to a set of lenses that I still use today and will use for many years to come.

Night changes the character of a city. Places that appear ordinary and uninteresting by day take take on a completely new appearance at night. Street lamps cast pools of light. Windows are lit and a few neon signs can make a quite street look live a mini Las Vegas. Darkness adds an air of mystery and, maybe, danger. And life gets even better when it rains.

We moved to Perth in 2014, when I retired. The lights of Perth don’t quite compare with Tokyo – but then I discovered puddles. Even the smallest puddle produces a spectacular reflection when the camera is at ground level. And, unlike Tokyo, the neglected streets and pavements of Perth are perfect for puddles.

I still enjoy to travel. I picked up a consulting job that has taken me to Cairo and Tbilisi – also great photo locations. And the money I earn feeds my photography hobby as well as the occasional photo trip to Japan.